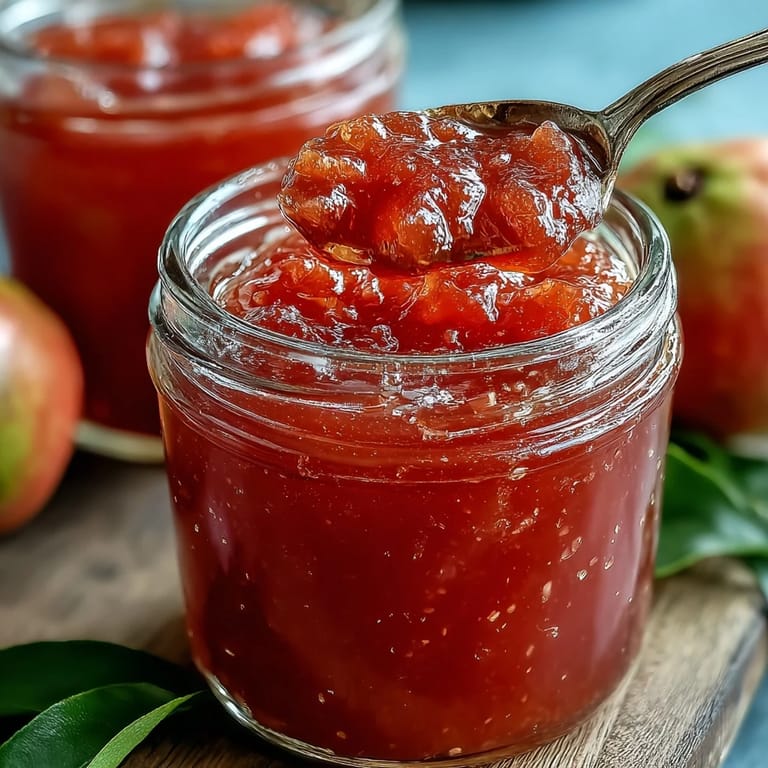
 Pin it
 My neighbor knocked on my door one August afternoon with a bag of guavas so fragrant I could smell them before she even opened her mouth. She'd picked too many from her tree and needed help before they all ripened at once. That's when I learned that making guava preserves isn't just cooking—it's capturing summer in a jar, and honestly, it's easier than you'd think.
I remember standing at the stove while my friend Marcus leaned against the counter, asking questions about every step. By the time the preserve thickened to that perfect glossy consistency, he was convinced he could do it himself—and honestly, he was right. Making this together turned a quiet afternoon into something memorable, the kind of moment where you're both learning something neither of you expected to care about.
Ingredients
- Ripe guavas (1.5 kg or about 10–12 medium): Choose fruit that yields slightly to pressure and smells intensely sweet—underripe guavas won't have the flavor depth you're after, and overripe ones become mushy too quickly.
- Granulated sugar (700 g): This is your preservative and thickener, so don't skimp, though you can reduce it slightly if you prefer less sweetness and accept a softer set.
- Fresh lemon juice (2 tablespoons): The acidity cuts through the sweetness and helps the preserve gel properly, so fresh juice makes a real difference here.
- Water (1 cup): This gives the fruit room to break down and cook evenly before you reduce it all down to that thick, luscious consistency.
Tired of Takeout? 🥡
Get 10 meals you can make faster than delivery arrives. Seriously.
One email. No spam. Unsubscribe anytime.
Instructions
- Prepare your guavas:
- Wash them under running water, then cut each one into quarters and scoop out the seeds with a spoon—take your time here because you want as much pink flesh as possible. The seeds have a slightly bitter taste, so removing them is worth the effort.
- Soften the fruit:
- Toss your guava flesh and water into a large saucepan and bring it to a boil, then dial down the heat and let it simmer for 15 to 20 minutes until the fruit turns soft and breaks apart easily. You'll notice the water turning pink and fragrant—that's when you know it's working.
- Break down the guavas:
- Mash them with a potato masher for texture, or blend briefly if you want something smoother—either way works beautifully. I prefer the masher because you have more control and it keeps some character in the final jam.
- Strain for smoothness:
- Press the mashed mixture through a fine sieve or food mill to catch any remaining seeds and get a silky pulp. This step separates an okay preserve from a really good one, so don't rush it.
- Build your preserve:
- Return the pulp to your saucepan, add the sugar and lemon juice, and stir everything together until the sugar dissolves. The mixture will seem loose at this point, but trust the process.
- Bring it to a boil:
- Crank the heat to medium-high and stir constantly—this prevents sticking and helps the sugar dissolve evenly. You'll see it start to bubble and foam slightly, which is completely normal.
- Simmer until thick:
- Lower the heat to medium and keep stirring frequently for 35 to 45 minutes, watching as the mixture transforms from thin and watery into something glossy and dense. The color deepens too, shifting from bright pink to a deeper coral-red that catches the light beautifully.
- Test for readiness:
- Drop a small spoonful onto a chilled plate and wait a few seconds—if the preserve wrinkles when you push it with your finger, it's done. If it slides around, give it another 5 minutes and test again.
- Jar your preserve:
- Skim off any foam, then carefully ladle the hot preserve into sterilized jars, leaving about 0.5 cm of headspace at the top. Seal immediately so the lids pop as they cool—that sound means you've done it right.
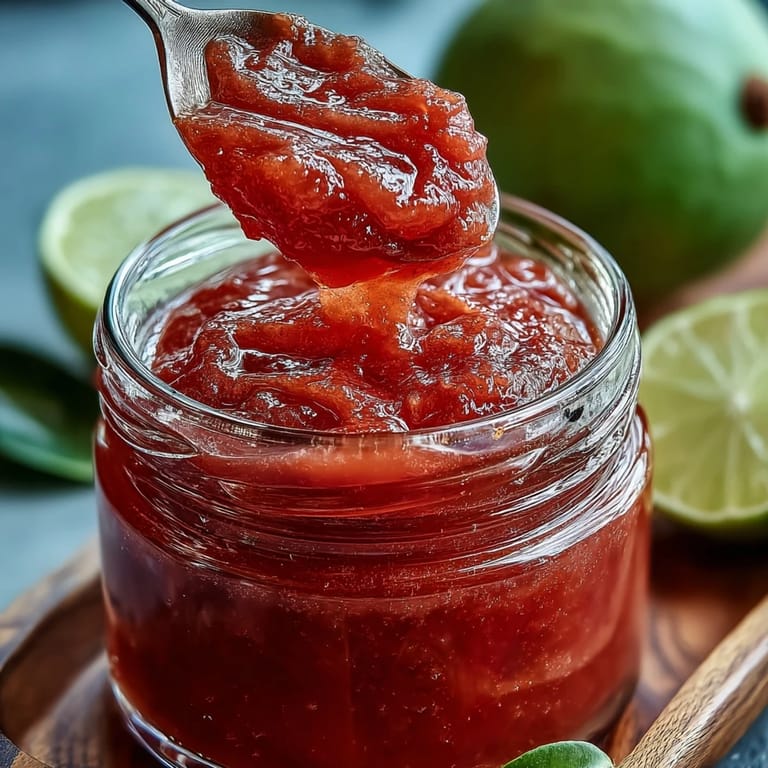 Pin it
 There's something almost magical about opening a jar of homemade preserve months later and tasting that moment of summer all over again. My aunt spread some on fresh bread one winter morning and just closed her eyes while she chewed, and I realized then that good preserves are edible nostalgia.
Why Seeding Matters
Guava seeds are small and hard, and if you leave them in, they'll stay that way—no amount of cooking softens them. Getting most of them out during prep saves you from a grainy, unpleasant preserve that catches between your teeth. The flesh is what you're really after anyway, and removing the seeds forces you to be intentional about it, which somehow makes the final result taste better.
The Science of Setting
Guavas are naturally pectin-rich, which is why this recipe doesn't need added gelling agents—the fruit itself does the work. The sugar draws out water from the fruit, and as the mixture reduces and concentrates, the pectin kicks in and creates that lovely set that spreads easily without being runny. Understanding this takes the mystery out of preserve-making and makes you feel more confident reaching for guavas again next season.
Serving Ideas and Storage
This preserve loves sharp cheddar and creamy brie equally, but it's also wonderful stirred into yogurt, swirled into cheesecake batter, or layered into a tart. Store it in the refrigerator for up to three months, or process in a boiling water bath if you want it to last longer.
- A little goes a long way—two tablespoons on a slice of good toast is a complete breakfast.
- If your preserve thickens too much as it cools, warm it gently and thin it with a splash of water.
- Label your jars with the date so you remember when you made them and can use them in order.
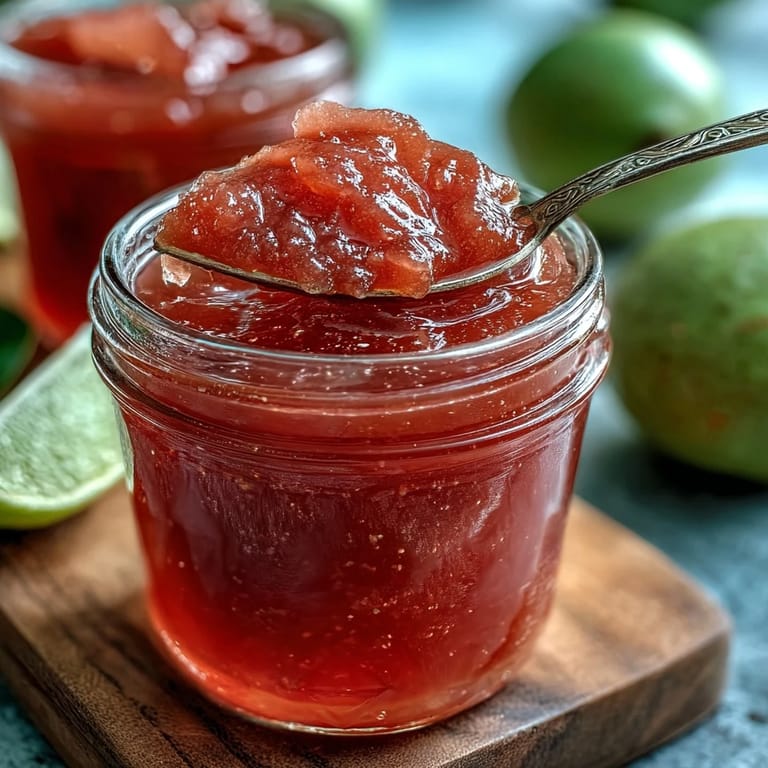 Pin it
 Making guava preserves is one of those cooking projects that feels like work while you're doing it and feels like pure accomplishment once it's done. Next time someone hands you a bag of guavas, you'll know exactly what to do.
Recipe FAQs
- → How do I know when the preserves are ready?
Test by placing a small amount on a chilled plate. If it wrinkles when you push it with your finger, the preserves have reached the correct consistency. This usually takes 35-45 minutes of simmering.
- → Can I use frozen guavas?
Yes, frozen guavas work well. Thaw completely before starting and drain any excess liquid. Adjust cooking time slightly as frozen fruit may release more water during the initial simmer.
- → How long will these preserves last?
Properly sealed and refrigerated, guava preserves stay fresh for up to 3 months. For longer storage, process jars in a boiling water bath for shelf-stable preservation up to one year.
- → What's the best way to serve guava preserves?
These preserves shine on warm toast or fresh bread. Pair with sharp cheeses like cheddar or aged gouda on cheese boards. Use as a filling for pastries, thumbprint cookies, or swirl into yogurt and oatmeal.
- → Can I reduce the sugar content?
You can reduce sugar slightly, but it helps with preservation and texture. For lower sugar options, consider using pectin or storing in the freezer rather than water bath canning.
- → Why do I need to remove the seeds?
Guava seeds are hard and unpleasant in smooth preserves. Removing them through sieving ensures a silky, spreadable consistency while retaining all the fruit's natural flavor and color.