 Pin it
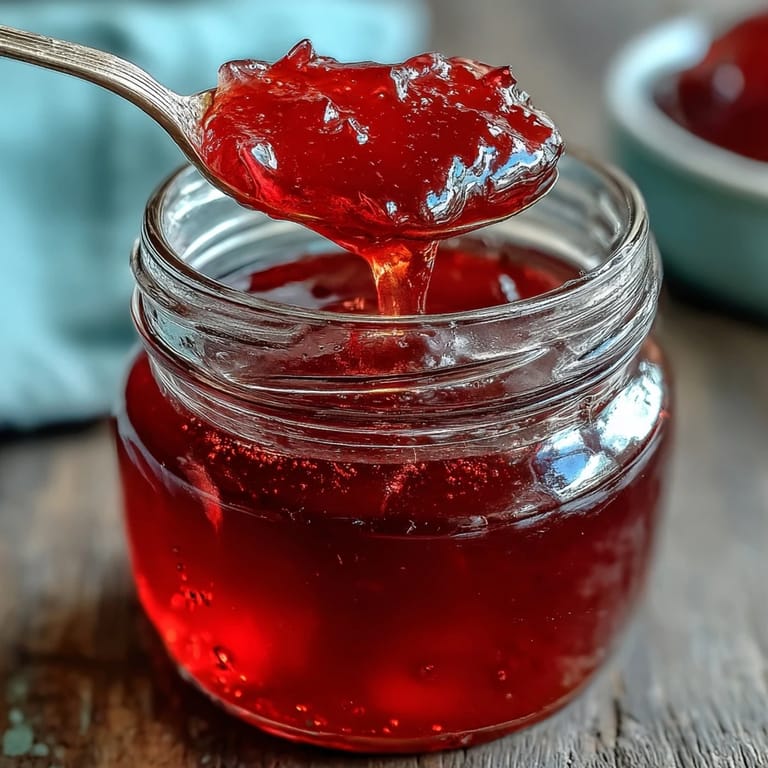
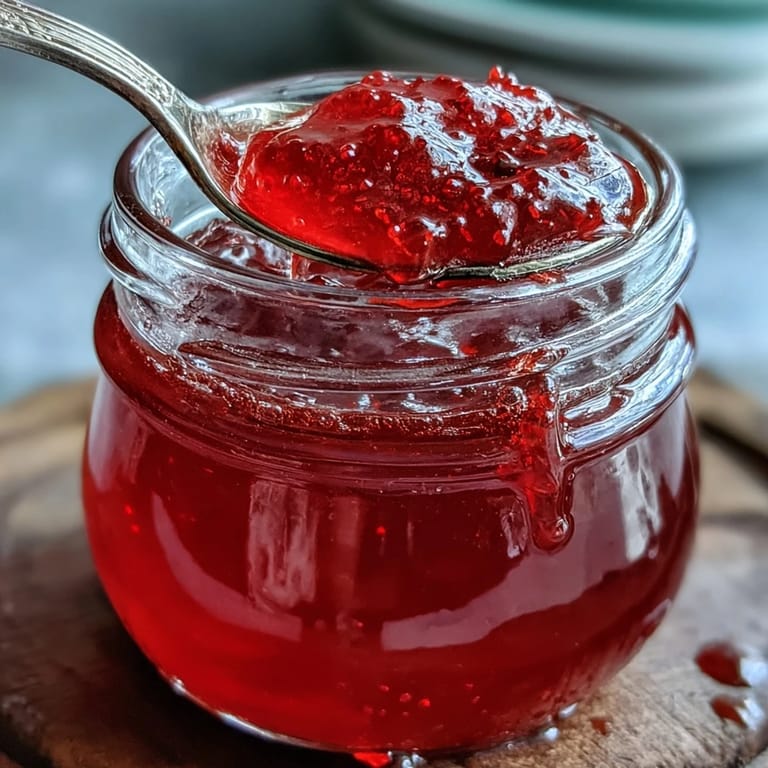
 My neighbor passed over a bag of guavas one humid afternoon, and I stood in my kitchen wondering what to do with them. The fruit was so fragrant it filled the entire room, and I remembered my grandmother mentioning jelly-making as something almost magical. That evening, I decided to try, and what emerged hours later was this glowing, jewel-toned preserve that looked like captured sunlight in a jar.
Years later, I brought jars of this jelly to a potluck, and someone used it to fill thumbprint cookies that disappeared within minutes. That night I realized this wasn't just something to spread on toast—it was the kind of gift that made people pause and ask what made it taste so much better than store-bought versions.
Ingredients
- Ripe guavas, 1.5 kg (about 3.3 lbs): Choose fruit that yields slightly to gentle pressure and smells fragrant; slightly underripe guavas have more natural pectin, which helps your jelly set without extra additives.
- Water, 4 cups: This draws out the juice and flavor while softening the fruit, creating the foundation for your jelly.
- Granulated sugar, 4 cups: The sugar both preserves and enhances the guava's natural sweetness; measure it after you've extracted your juice for the best ratio.
- Lemon juice, 2 tbsp: This brightens the flavor and helps with the gelling process by adding pectin and acid.
Tired of Takeout? 🥡
Get 10 meals you can make faster than delivery arrives. Seriously.
One email. No spam. Unsubscribe anytime.
Instructions
- Prepare Your Fruit:
- Wash the guavas under cool running water, rubbing away any dirt with your fingers. Cut them into quarters, leaving the skins and seeds intact because they're packed with pectin that helps the jelly set.
- Simmer Until Tender:
- Place the guava pieces in a large saucepan and add the water, then bring everything to a boil over medium heat. Once it's bubbling, lower the heat and let it simmer gently for about 30 minutes until the fruit completely falls apart when you press it with a spoon.
- Strain Patiently:
- Line a large strainer with cheesecloth folded in half, setting it over a clean bowl. Carefully pour in the cooked fruit and liquid, then let it sit undisturbed for at least 2 hours or overnight—this patience rewards you with crystal-clear jelly. Resist the urge to press or squeeze the fruit.
- Calculate Your Sugar Ratio:
- Measure the juice that's collected, and you'll need one cup of sugar for each cup of juice. Pour the juice into a clean saucepan, add the lemon juice, and stir in the measured sugar until it's mostly dissolved.
- Reach the Perfect Temperature:
- Bring the mixture to a boil over high heat, stirring occasionally to help the sugar dissolve completely. Boil rapidly for 15 to 20 minutes, skimming off any foam that rises to the surface, until a candy thermometer reads 220°F (104°C).
- Test for Doneness:
- Place a small spoonful of jelly on a cold plate and let it cool for a moment. If it wrinkles when you push it with your finger, it's ready to jar.
- Jar and Seal Immediately:
- Pour the hot jelly into sterilized jars, leaving 1/4-inch of headspace at the top. Seal the jars right away so they create a proper seal as they cool.
- Cool Completely:
- Let the jars sit undisturbed at room temperature until they're completely cool, which usually takes several hours. Then store them in a cool, dark place where they'll keep for months.
 Pin it
 There's something deeply satisfying about seeing those sealed jars lined up on a shelf, each one containing the concentrated essence of summer fruit. It feels like you've somehow stopped time in a jar.
Why This Jelly Holds Up
The combination of guavas' natural pectin and the precise ratio of sugar creates a preserve that stays set without any added gelling agents. The long, slow simmer breaks down the fruit completely while the sugar dissolves and concentrates the flavor, so what you end up with is genuinely better than anything commercial.
Beyond Toast
Once I had several jars on hand, I stopped thinking of this as just a spread and started using it everywhere. Swirled into yogurt in the morning, glazed over roasted chicken for dinner, dolloped onto vanilla ice cream as a simple dessert—it's one of those preserves that quietly transforms whatever it touches.
Storage and Serving Ideas
Unopened jars keep beautifully in a cool, dark cupboard for months, but once you open one, move it to the refrigerator and use it within three weeks. The deep jewel tone only gets more stunning in the light when you're reaching for it day after day.
- Spread it on warm toast with a touch of soft butter for a simple breakfast that feels intentional.
- Use it as a filling for thumbprint cookies or swirled into cake batters for unexpected sweetness.
- Glaze ham or roasted vegetables with a thin layer for a subtle, fruity shine.
 Pin it
 Making guava jelly is one of those small kitchen projects that feels almost ceremonial, turning fresh fruit into something that lasts. There's real magic in that transformation.
Recipe FAQs
- → How do I know when the jelly reaches gel stage?
Use a candy thermometer to check when the mixture reaches 220°F (104°C). You can also test by placing a small spoonful on a cold plate—if it wrinkles when you push it with your finger, it's ready to jar.
- → Why shouldn't I press the fruit while straining?
Pressing or squeezing the fruit releases particles that make the jelly cloudy. Letting the juice drip naturally through cheesecloth for several hours or overnight ensures a crystal-clear, jewel-toned result.
- → Can I use overripe guavas?
While ripe guavas work best, slightly underripe fruit contains more natural pectin which helps the jelly set. Avoid completely overripe guavas as they may not gel properly and can result in a softer final product.
- → How should I store the finished jelly?
Pour hot jelly into sterilized jars and seal immediately. Let cool completely, then store unopened jars in a cool, dark place. Once opened, keep refrigerated and use within three weeks for best quality.
- → What can I use guava jelly for besides toast?
This versatile preserve works beautifully as a filling for thumbprint cookies, a glaze for cakes and tarts, a topping for ice cream or yogurt, or even paired with cheese on a charcuterie board for sweet-savory contrast.
- → Is lemon juice necessary?
Yes, lemon juice serves two purposes: it balances the sweetness with brightness and helps the jelly set properly by interacting with the fruit's natural pectin. Don't skip this ingredient for best results.