 Pin it
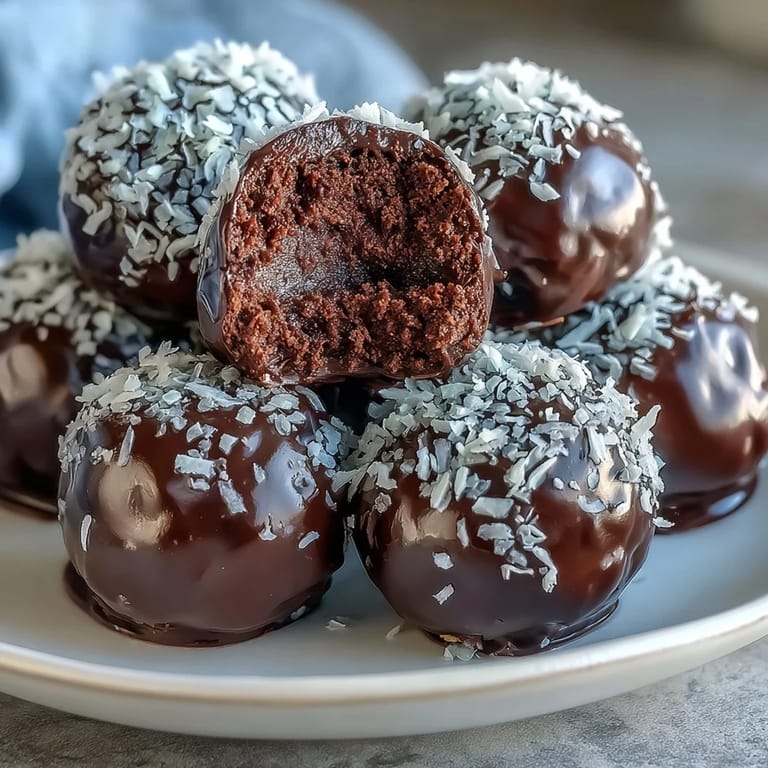
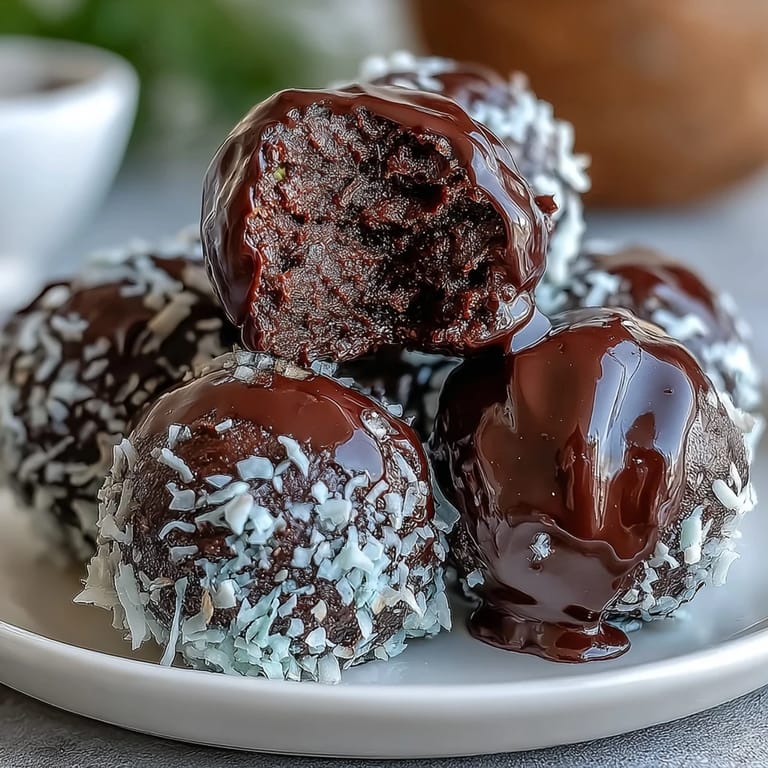
 My friend Sarah texted me a photo of some fancy truffles from a chocolate shop, complaining about the price tag. I looked at them and thought, those are just chocolate and cream, but then she mentioned they were vegan and somehow that made them seem even more luxurious. That afternoon, I had half an avocado sitting in my fruit bowl getting darker by the hour, so I decided to test a theory: what if the creaminess everyone raves about in avocado toast could become something decadent? Twenty minutes later, I was rolling dark chocolate clouds in coconut, and suddenly I understood why she'd been willing to pay that price.
I brought a batch to my book club last month, and someone actually paused mid-conversation to ask if I'd bought them. The woman next to me took a second one and said it tasted like what she imagined velvet would taste like if velvet were edible. I didn't tell her about the avocado until everyone had eaten at least two—I wanted them to taste perfect first, judgment-free.
Ingredients
- Ripe avocado: This is the soul of the truffle; too firm and they'll be grainy, too soft and they'll be too loose to hold their shape, so aim for that sweet spot where the skin yields to gentle pressure.
- Vegan dark chocolate: Quality matters here because there's nowhere to hide—choose something with at least 70 percent cacao because the richness will cut through the richness of the avocado.
- Pure vanilla extract: Real vanilla makes a difference; the imitation version tastes a little chemical against the chocolate, and you want every note to sing.
- Sea salt: A tiny pinch does something almost magical to chocolate, deepening the flavor in ways you won't consciously notice but absolutely will taste.
- Maple syrup: This is optional but I always add it because it rounds out the flavor and makes the mixture slightly easier to work with.
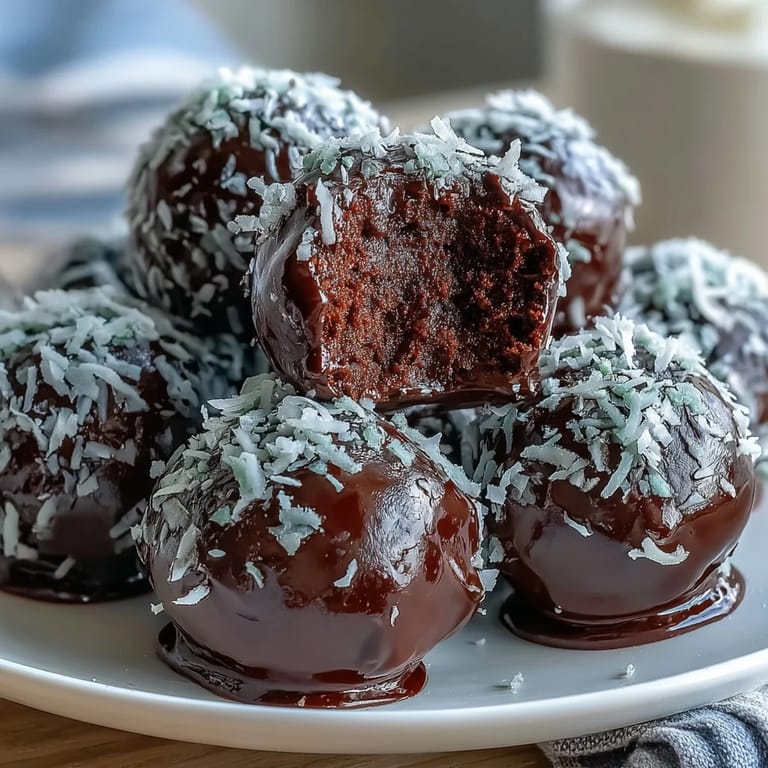
- Unsweetened shredded coconut: The unsweetened part is crucial—sweetened coconut will make these cloying, and you want that toasted, slightly savory coconut flavor as a contrast.
Tired of Takeout? 🥡
Get 10 meals you can make faster than delivery arrives. Seriously.
One email. No spam. Unsubscribe anytime.
Instructions
- Melt the chocolate gently:
- Set your heatproof bowl over simmering water, not boiling, and let the chocolate soften slowly—rushing this step makes it seize up and grainy. If using a microwave, thirty-second bursts prevent overheating and give you better control.
- Mash the avocado until silky:
- Use a fork and take your time here because any little lumps will be noticeable in the final texture. You want it almost fluffy, like soft mousse.
- Combine with chocolate:
- Fold the melted chocolate into the avocado gently, then add vanilla, salt, and maple syrup—mix until the mixture is glossy and completely homogeneous. The color should be a rich, dark brown with no green streaks.
- Chill until firm:
- Forty minutes in the refrigerator is usually enough, but if your kitchen is warm, give it the full hour. The mixture should hold its shape when you press it but still be soft enough to roll.
- Prepare your coating:
- Pour the shredded coconut into a shallow dish or even a plate—this makes rolling easier because you can roll directly into it without reaching.
- Roll into balls:
- Scoop a heaping teaspoon of the chilled mixture and roll it between your palms using gentle pressure—they'll naturally round out. If your hands get too warm and the mixture starts sticking, dip your fingers in cold water or take a thirty-second break.
- Coat in coconut:
- Roll each ball in the coconut, turning it gently until completely covered. Some people like a thick, shaggy coating; others prefer just a light dusting—both are right.
- Chill one more time:
- Ten minutes in the fridge sets the coconut coating and makes them less likely to get messy when you pick them up. Place them on parchment paper so they don't stick.
 Pin it
 My roommate came home while I was rolling the last batch, took one bite, and asked if I could make them every week. I told him they're actually so simple that he could make them himself, but I think we both knew that wasn't going to happen. There's something about homemade truffles that feels like a small luxury, even though they're genuinely easy.
Flavor Variations That Actually Work
I've experimented with adding things to the base mixture, and some combinations are genuinely better than the plain version. A teaspoon of instant espresso powder deepens the chocolate in a way that makes people pause and try to figure out what they're tasting, while a pinch of cinnamon adds warmth without being obvious about it. I once added a tiny bit of cayenne pepper on a whim, and it created this subtle heat at the back of your throat that made the chocolate feel more complex.
Rolling Tips from Real Experience
The trickiest part of this whole recipe is the actual rolling because the mixture can stick to your hands if it gets too warm. I learned to work quickly, do five or six truffles, then wash my hands in cold water and dry them completely before continuing—it sounds fussy, but it genuinely makes everything easier. If you have a cookie scoop, it's a game-changer for getting evenly-sized truffles, and some people swear by lightly oiling their hands, which does reduce sticking without making the surface oily.
Storage and Serving
These truffles live in the refrigerator because they soften at room temperature, which isn't necessarily bad but changes the experience. I keep mine in a glass container with parchment between the layers so they don't stick together, and they've lasted up to a week, though honestly they never last that long in my house.
- Keep them in an airtight container away from anything with a strong smell because chocolate absorbs odors.
- They're actually perfect straight from the fridge because the contrast between cold and creamy is part of the appeal.
- If you're giving them as a gift, they look stunning in a small box lined with parchment and tied with twine.
 Pin it
 These truffles have become my go-to when I want to impress someone without actually trying very hard. They're proof that the simplest ingredients, treated with a little care, become something that tastes like you've been keeping secrets in your kitchen.
Recipe FAQs
- → How do I melt the chocolate without burning it?
Use a double boiler or microwave in short bursts, stirring frequently until smooth to prevent scorching.
- → Can I use other coatings besides shredded coconut?
Yes, try finely chopped nuts, cocoa powder, or freeze-dried berry powder for different textures and flavors.
- → What is the best way to ensure a smooth truffle texture?
Mash the avocado thoroughly until creamy before mixing with chocolate to achieve a smooth, luscious consistency.
- → How long should I chill the mixture before shaping?
Chill for at least 40 minutes until firm enough to scoop and roll easily without sticking.
- → Are these truffles suitable for special diets?
Yes, they are vegan and gluten-free, but check chocolate ingredients for potential allergens like soy or nuts.