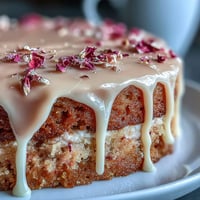
 Pin it
 My sister called me in a panic two days before Easter, asking if I could make something magical for her kids' brunch—something that would make them squeal with delight the moment they saw it. I'd never shaped a cake like a bunny before, but something about the challenge excited me, so I said yes before I could talk myself out of it. That night, I sketched bunny designs on scrap paper while sipping coffee, imagining how the buttercream could become fur and how gold sprinkles might catch the morning light. This cake turned out to be less about baking skill and more about channeling that childlike wonder into something edible and unforgettable.
I'll never forget the moment I set that bunny cake on my sister's table and watched her three-year-old literally gasp, point, and say, 'It's alive!' in the most serious voice. The older kids immediately wanted to know how I'd made the ears stand up, and suddenly I was in the middle of explaining cake geometry at 8 a.m. on Easter morning—not exactly how I'd pictured my Saturday, but honestly, it became one of my favorite kitchen memories because the cake mattered less than the moment itself.
Ingredients
- All-purpose flour: Use 2½ cups and make sure to spoon and level it into your measuring cup rather than scooping straight from the bag, which packs it down and can throw off your ratios.
- Baking powder: The 2½ teaspoons is crucial here; it's what gives you that tender crumb that makes people ask if you used a mix.
- Unsalted butter (softened): Let it sit at room temperature for at least 30 minutes before creaming; cold butter won't incorporate air and your cake will be dense instead of feathery.
- Granulated sugar: This is your 2 cups; cream it with butter until the mixture looks pale and fluffy, almost like frosting.
- Room temperature eggs: Cold eggs seize up when you add them to warm butter, creating a curdled mess that's hard to recover from.
- Pure vanilla extract: The 1 tablespoon goes into the batter, and another tablespoon goes into the frosting; don't skip either one.
- Whole milk: Use 1 cup to alternate with the flour mixture; this moisture is what keeps the cake from drying out.
- Unsalted butter for frosting: Another 1 cup, softened the same way as your baking butter.
- Powdered sugar (sifted): The 4 cups must be sifted or pressed through a fine sieve before beating, otherwise you'll have grainy frosting.
- Sweetened shredded coconut: Buy the kind in the baking aisle; use 1 cup for the fur, and tint some with pink food coloring for inner ears.
- Pink gel food coloring: Gel is stronger than liquid, so a tiny drop goes a long way in the coconut and frosting.
- Large marshmallows: Two of these become the cheeks; they stick beautifully to frosting without any extra help.
- Mini marshmallows: Two of these are your teeth; arrange them in a little row along the bottom of the bunny's face.
- Black licorice laces or black gel icing: Use these for the whiskers, eyes, and mouth; licorice laces look more whimsical but gel icing is easier to control.
- Gold sprinkles: These are the final touch that makes everything sparkle; don't be shy with them.
Tired of Takeout? 🥡
Get 10 meals you can make faster than delivery arrives. Seriously.
One email. No spam. Unsubscribe anytime.
Instructions
- Heat your oven and prepare the pans:
- Preheat to 350°F and grease both 9-inch round pans with butter, then dust them lightly with flour so your cakes release cleanly. This takes about 5 minutes and it's worth not rushing.
- Combine your dry ingredients:
- In a medium bowl, whisk together the flour, baking powder, and salt until they're evenly distributed. This prevents lumps and ensures your batter rises evenly in the oven.
- Cream the butter and sugar:
- Beat softened butter and granulated sugar together in a large bowl for about 3 to 4 minutes until the mixture is pale, fluffy, and almost looks like frosting. This step incorporates air, which is what makes your cake light instead of heavy.
- Add the eggs one by one:
- Drop in each egg individually, beating well after each one so it's fully incorporated before you add the next. If you add all the eggs at once, your batter will look broken and curdled, which affects the final texture.
- Mix in the vanilla:
- Stir in the 1 tablespoon of pure vanilla extract until it's evenly distributed throughout the batter.
- Alternate your flour and milk:
- Add about one-third of the flour mixture, beat gently until combined, then add half the milk, beat, then the remaining flour, beat, then the last of the milk, and finally the last bit of flour. This alternating method prevents overmixing, which would make your cake tough.
- Divide and bake:
- Pour the batter evenly into both prepared pans and bake for 30 to 35 minutes until a toothpick inserted in the center comes out clean. Your kitchen will smell like vanilla heaven.
- Cool the cakes:
- Let them sit in the pans for 10 minutes, then turn them out onto wire racks and let them cool completely before you touch them for assembly. Warm cake is fragile and will crumble if you try to frost it too early.
- Make your buttercream frosting:
- Beat the softened butter until it's creamy, then gradually add the sifted powdered sugar a little at a time so you don't create a cloud of sugar. Once it's combined, add the milk, vanilla extract, and salt, and beat until the frosting is fluffy and smooth, about 2 to 3 minutes.
- Arrange your bunny shape:
- Place one cake round on your large serving platter as the bunny's face. Cut two ovals from the second round for ears and position them at the top, angling them slightly outward so they look alert and perky.
- Create the bowtie:
- Use the remaining piece from the second cake to form a small bowtie shape below the face; you can trim it with a serrated knife if needed.
- Apply the crumb coat:
- Spread a very thin layer of buttercream over the entire bunny shape to seal in any crumbs. Chill the cake for 20 minutes so this layer sets and makes the next frosting layer much neater.
- Add the final frosting:
- Apply a thick, even layer of buttercream to all exposed cake surfaces, smoothing it with an offset spatula. You can make it rustic and textured or smooth and polished, depending on what you're going for.
- Press on the coconut fur:
- Gently press shredded coconut onto the frosted areas, covering everything except where you'll place the marshmallow cheeks and where you'll draw the face. The coconut sticks beautifully and looks incredibly fluffy and realistic.
- Tint and add the pink details:
- Mix a small amount of shredded coconut with a drop or two of pink gel food coloring to create the inner ear and nose pieces. Arrange the pink coconut inside the ear ovals and shape a small nose.
- Position the marshmallow features:
- Press the two large marshmallows onto the sides of the face for cheeks, and arrange the two mini marshmallows in a little row below the nose for teeth. They'll stick right to the frosting without any fuss.
- Draw the face:
- Use black licorice laces or black gel icing to create whiskers, eyes, and a mouth. Licorice laces give a charming, whimsical look, while gel icing lets you be more precise if you prefer.
- Add the sparkle:
- Generously sprinkle gold sprinkles over the bunny, especially across the buttercream frosting areas where they'll catch the light and make the whole cake shimmer like something magical.
 Pin it
 The real payoff of this cake isn't in the baking or decorating—it's in watching someone's face light up when they realize the bunny is actually made of cake. My sister texted me a photo three days later of her youngest still talking about 'the sparkly bunny cake,' and honestly, that text made my entire week. When dessert becomes a memory instead of just something sweet, you know you've done something right.
Variations and Flavor Twists
If vanilla isn't your family's thing, you can easily pivot without starting from scratch. For a chocolate version, simply substitute ½ cup of the all-purpose flour with unsweetened cocoa powder, which deepens the flavor without making the cake dry or overly dense. You could also swap the vanilla extract for almond extract if you're feeling adventurous, or add the zest of a lemon to the batter for something bright and spring-like. The buttercream frosting adapts beautifully too—add a couple tablespoons of cocoa powder for chocolate frosting, or a few drops of lemon juice to complement citrus cake.
Decoration Ideas and Party Presentation
The beauty of this bunny cake is that it invites creativity and personalization without requiring advanced decorating skills. Gold sprinkles are gorgeous, but edible gold leaf or edible gold dust brushed onto the frosting creates an even more luxurious shimmer if you're feeling fancy or making this for a special occasion. You could tint the buttercream pastel pink or lavender instead of keeping it white, swap the marshmallows for fondant shapes, or even add a small royal icing bow around the bunny's neck. The joy comes from making it your own, not from following rules perfectly.
Storage and Make-Ahead Tips
This cake is forgiving and flexible with timing, which makes it perfect for busy holiday planning. You can bake the cake layers a day or two ahead, wrap them tightly in plastic wrap, and store them at room temperature or in the fridge until you're ready to frost. The frosting itself keeps in an airtight container in the fridge for up to a week, so you could make that early too and simply let it soften before decorating.
- Once assembled and decorated, keep the finished bunny cake covered loosely with plastic wrap at room temperature for up to 2 days, or refrigerate it for up to 5 days.
- If you're traveling with the cake, assemble it at your destination rather than trying to transport the decorated version, which prevents frosting smears and broken pieces.
- Leftover cake keeps beautifully wrapped in plastic in the fridge, and it actually tastes just as moist and delicious on day four as it did on day one.
 Pin it
 This cake is proof that you don't need fancy skills to create something that feels magical and memorable. The simplicity of good vanilla cake, silky buttercream, and playful decorations is exactly what makes people love it.
Recipe FAQs
- → What flour type is best for this cake?
All-purpose flour provides the best structure and tenderness for this vanilla-based cake.
- → How do I get the bunny shape?
The shape is formed by cutting two ovals from one cake layer for ears and arranging remaining parts as the face and bowtie.
- → What ingredients add flavor to the frosting?
Butter, powdered sugar, vanilla extract, and milk create a smooth, creamy buttercream with a classic vanilla taste.
- → Can decorations be prepared in advance?
Yes, marshmallow and coconut decorations can be prepared ahead and stored at room temperature before assembling.
- → How should the cake be stored after assembling?
Store covered at room temperature for up to 2 days or refrigerate for up to 5 days to keep fresh and moist.